The original Amesz 4×4 Camper was fitted with an Ibis air conditioner. Whilst I am sure this airconditioner served the previous owners well, it was something we decided would be best upgraded. The new Ibis Mk3 was released in May 2014 and promised 20% better cooling performance, and quieter running when cooling. Looking around the web, we found this airconditioner is retailing for about $1,700. We purchased our through the guys at Caravan Services at Underwood. Their price was very competitive.
We decided to install the unit ourselves, as we were replacing an existing Ibis unit, and we had been told that there shouldn’t be too many issues. Something to remember when you pick up the unit is that it needs to be stored horizontally, to ensure it is not damaged. Luckily, the unit fitted perfectly in the back of the ute.
Fitting the unit went well, but was not without it’s issues.
First issue, how to lift 48kg 3.4m off the ground whilst keeping the unit horizontal and not killing ourselves. Funny how things you thought would never help you in life at school come back! Eg The use of an inclined plane, or simply a ladder enabled the lifting and the removal of the old Ibis.
I think some of the worst parts of this project were choosing one of the hottest Brisbane days to do it, and the time it took to clean up the remnants of the old Ibis. The whole removal and cleanup process took over 3 hours before I could start the installation of the new Ibis Mk3. My biggest concern in this project was the position of the bash plate in front of the airconditioner. Despite four months of research, no one could confirm whether the new Ibis would position in the same location as the old one. So it was not until the new unit was fully positioned that I could see that this was not going to be an issue. Fantastic!
So it would seem that this changeover was going to be very easy? Wrong!
The Amesz guys did an amazing job of fitting the old Ibis. They actually welded triangle holding plates to the inside corners of the access hole. These Amesz 4wd motorhomes have been built tough to handle the Australian roads, and this is just another example of their impressive workmanship. So what is the issue? Well the new Ibis Mk 3 would not fit because of these welds. Bugger!
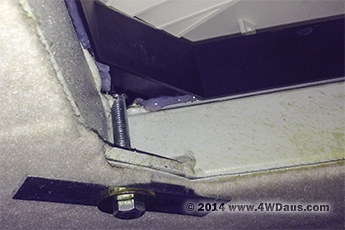
Sometimes it is best to sleep on a problem, and doing this proved a winner. Utilising some aluminium angle from another job we had done, I was able to modify the new fitting to slide right on in.
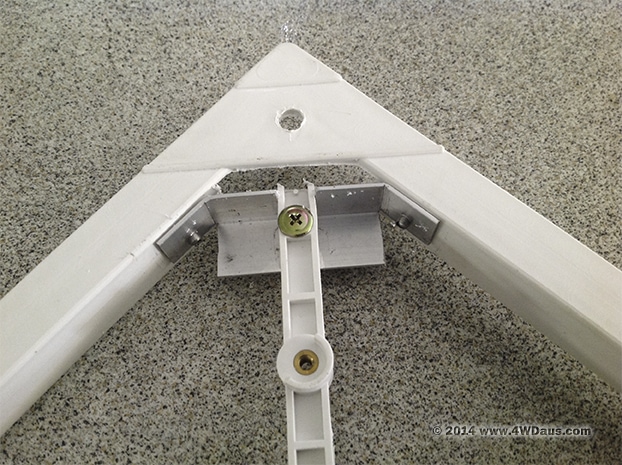
The modification involved removing the corner part of the interior fitting and reinforcing it to ensure it would last the life time. The corner is not visible after the final fittings are installed, and this ensured the over all aesthetics were maintained. So how did the final fitting end up? Fantastic!
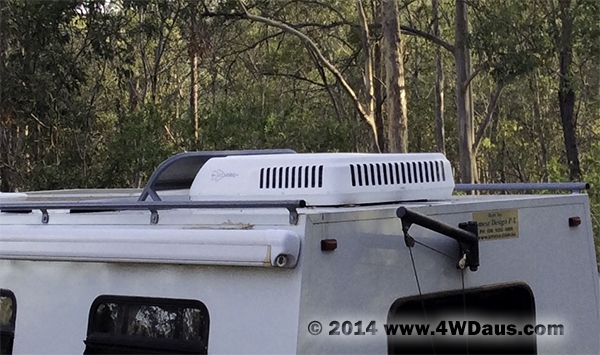
of course we needed to test the installation, so firstly we hooked up the truck to our home electricity. The unit started first pop, and after a brief initialisation procedure, we were well on the way to cooling down. The Ibis 3 worked very well and soon the truck cabin was a comfortable 22 degrees. So much for work for the rest of the day as we settled into the cool to relax and watch a show (on our new 12 volt TV …but then that’s another story).
The next test was to run the Ibis 3 from our Honda 20Ui Generator. The old unit couldn’t do this without the installation of a special “soft start” mod. So I was keen to test this feature…mmmm cold AC in the middle of the desert…anyway back to reality. So I set up the gennie and hooked it into the truck’s power inlet. The Ibis started immediately and was soon cooling down without any issues. The Honda was working hard, but that’s what they do when they are pushing out 1700 watts!!!
So mission accomplished.Now for the test out in the real world.
Cheers for now
Steve